As with most manufacturing methods, there many techniques to overcome different material constraints but the core process is the same across the board. There are four main methods used in the creation of moulded veneer forms. The four methods typically used are:
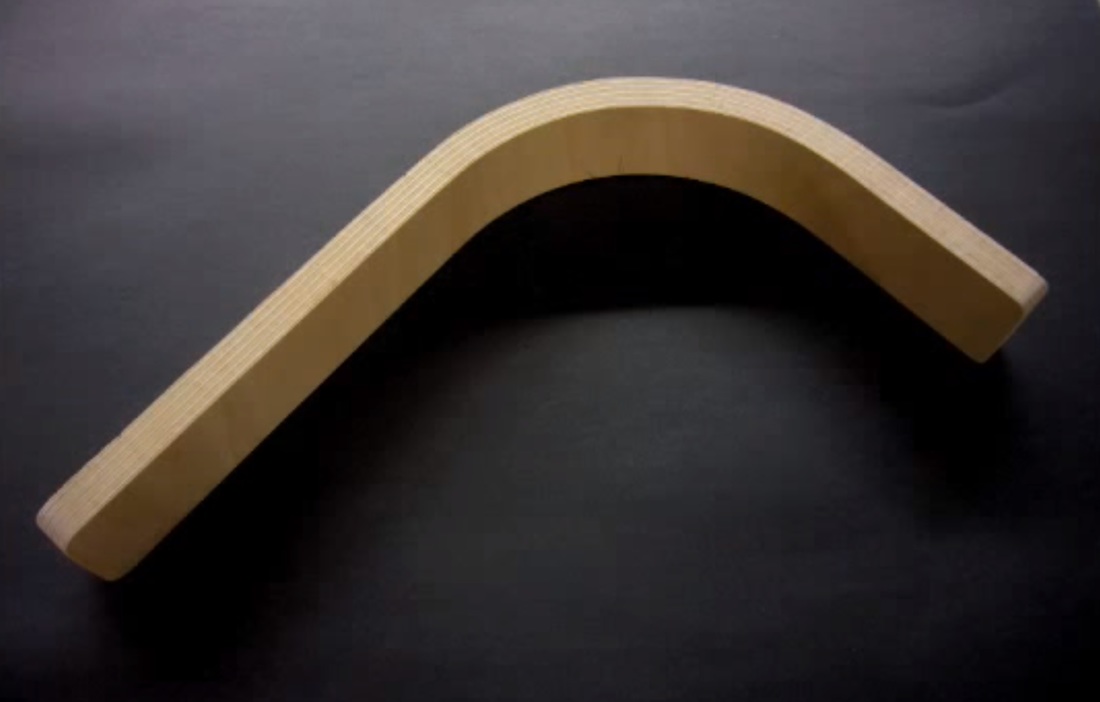
As a step by step guide I will explain the process of making a simple chair leg using the cold pressing process with a one part mold, this method can easily be adapted to suit other projects or processes.
- Cold pressing - Cold pressing uses a single sided mould with the addition of clamps or a split mould consisting of a die (lower mould) and a plug (upper mould) with clamps or a press to apply pressure. More suited to low to medium volumes due to the slow turnaround time. (https://www.youtube.com/watch?v=KRwGoauO9sQ )
- Vacuum bag/vacuum membrane press - Vacuum bag or vacuum membrane press uses a single mould and a vacuum to form the veneer into the desired shape. Best suited towards low to medium volumes, however if used in conjunction with heat or RF curing high volumes can be produced. (https://www.youtube.com/watch?v=6shKGR8tSVU)
- Heat curing - Heat curing is most commonly used in conjunction with a vacuum membrane press. Radiant heat is applied to the work while under a vacuum to reduce the glue curing time. This method greatly increases the production turnaround.
- Radio frequency curing - RF curing commonly used in conjunction with a die and plug mould uses radio frequencies to apply heat to the glue to decrease curing times, similar to the method of heat curing. Both heat and RF curing are used primarily as a way to increase the production volumes.
As a step by step guide I will explain the process of making a simple chair leg using the cold pressing process with a one part mold, this method can easily be adapted to suit other projects or processes.
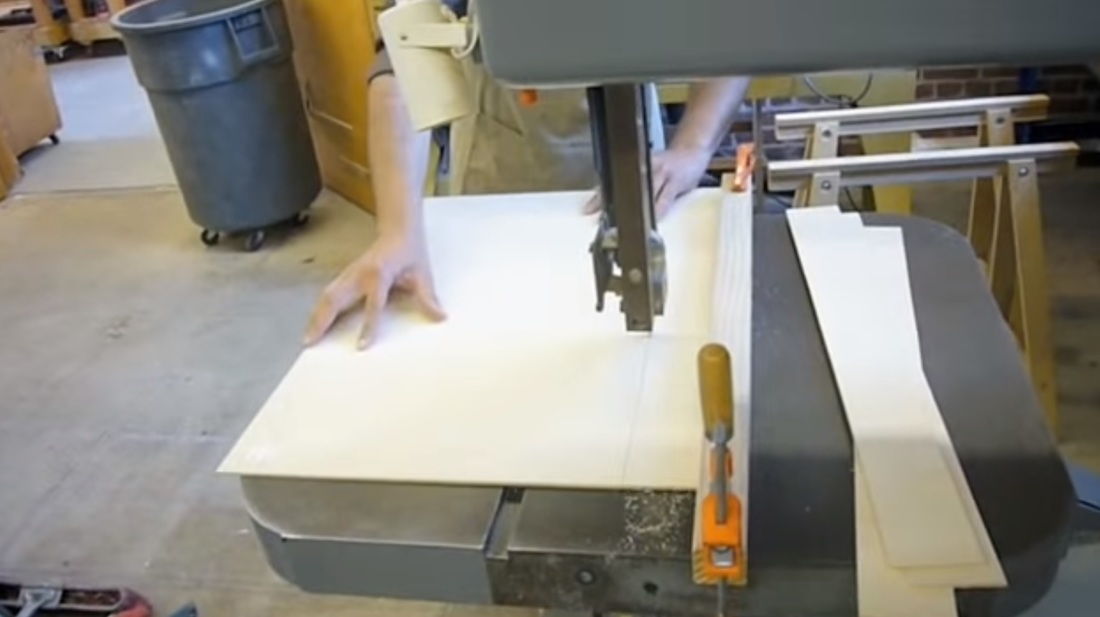
1. Cut your veneer strips to the desired width and length making sure to leave an extra 2-4 cm of material on all sides (this will be trimmed off later for a nice clean edge). After the strips are cut it's good practice to test them for any defects or cracks by bending them both directions a couple times, if you hear or see any cracks or splits its best to replace that piece.
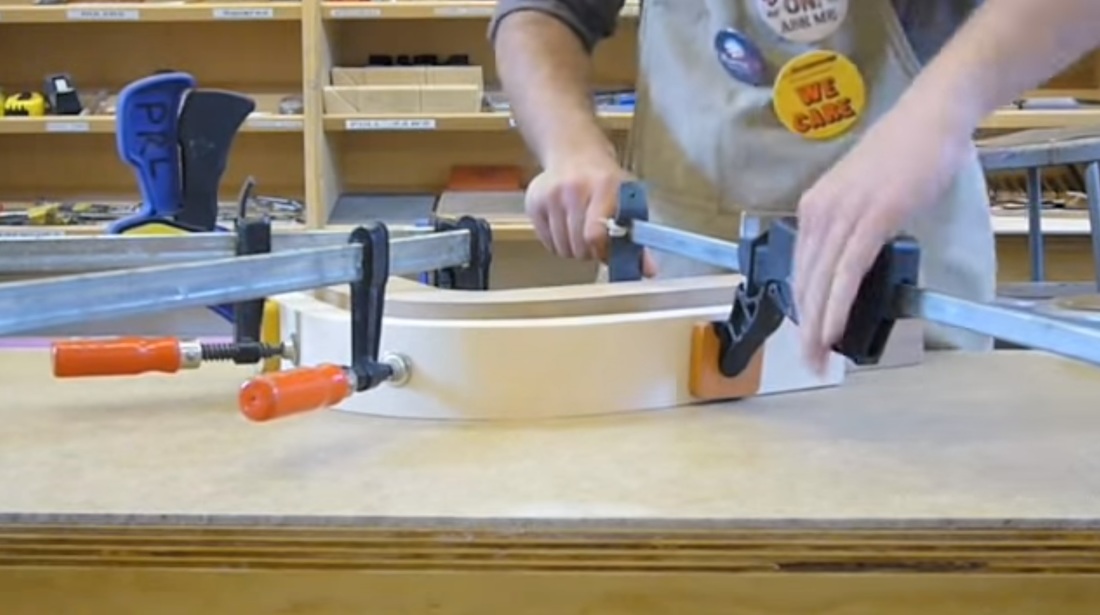
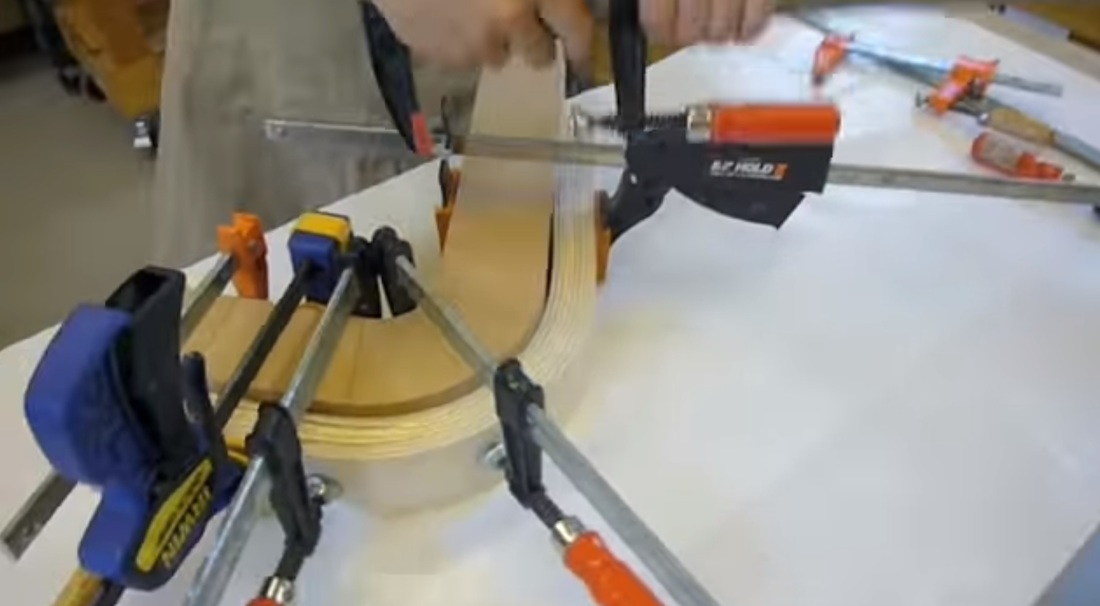
2. Assemble your strips together and perform a dry test fit with the mold (no glue) this allows you to test how many clamps will be needed, the best positioning of the clamps and it there are any problems with the form before it's glued. Make sure there are no gaps between the veneers and the mold, add more if needed and take time to mark out the placement of the clamps.
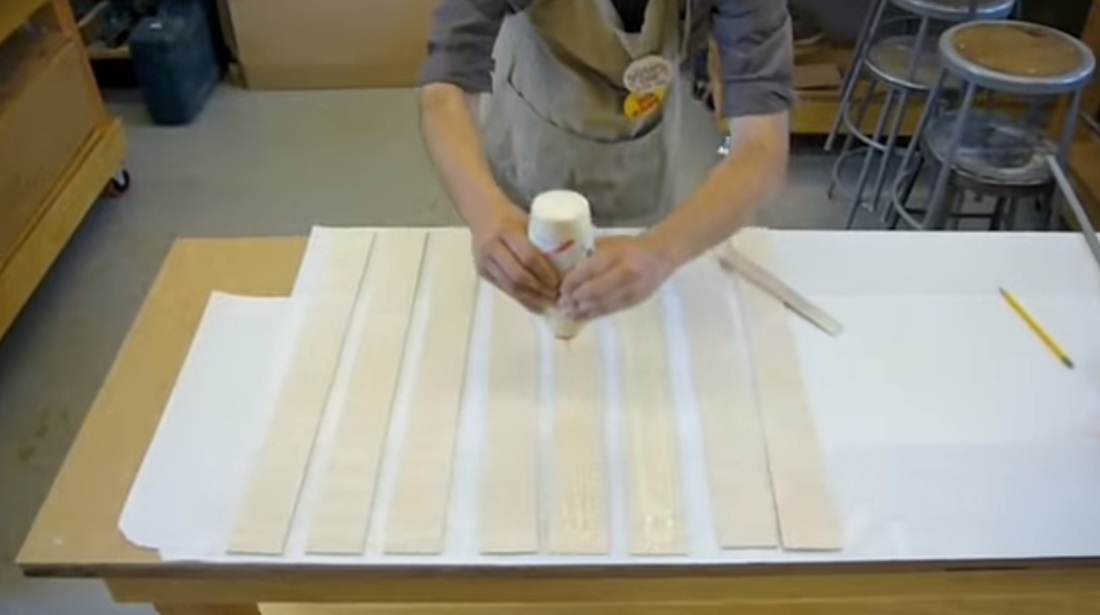
3. Using a paint roller or speciality glue roller apply an even spread of glue to both faces of the veneer excluding the outer surfaces and stack the strips together.
4. Clamp the glued veneer stack to the mold using the marked clamp positions from step 2, work quickly as the glue doesn't take long to set.
5. After about 6-10 hours depending on the whether the clamps can be removed, if in doubt it's always better to leave the clamps on longer to ensure the glue is fully set.
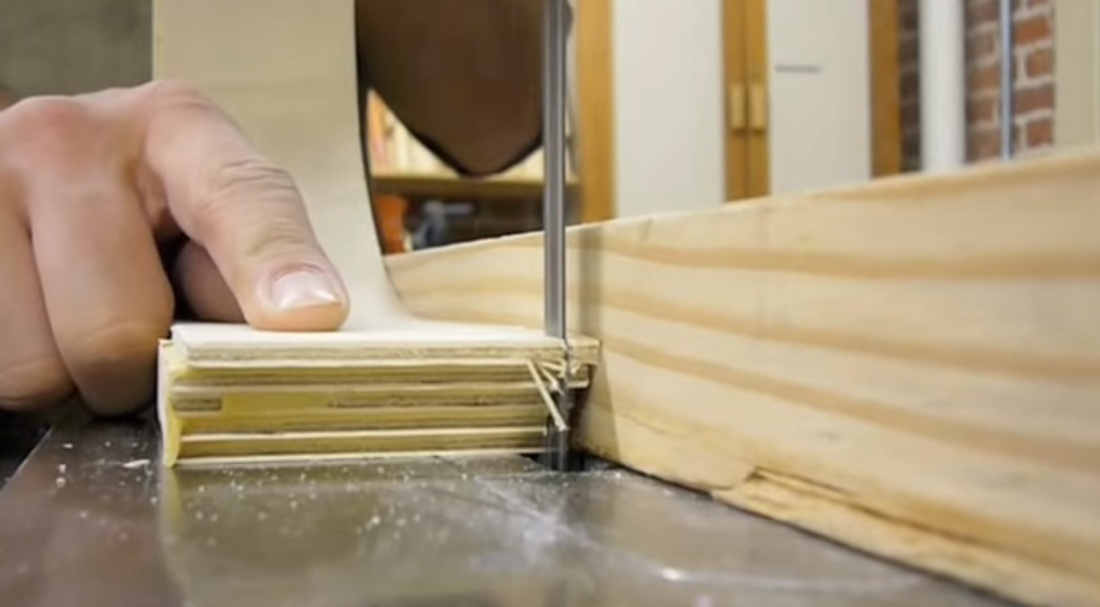
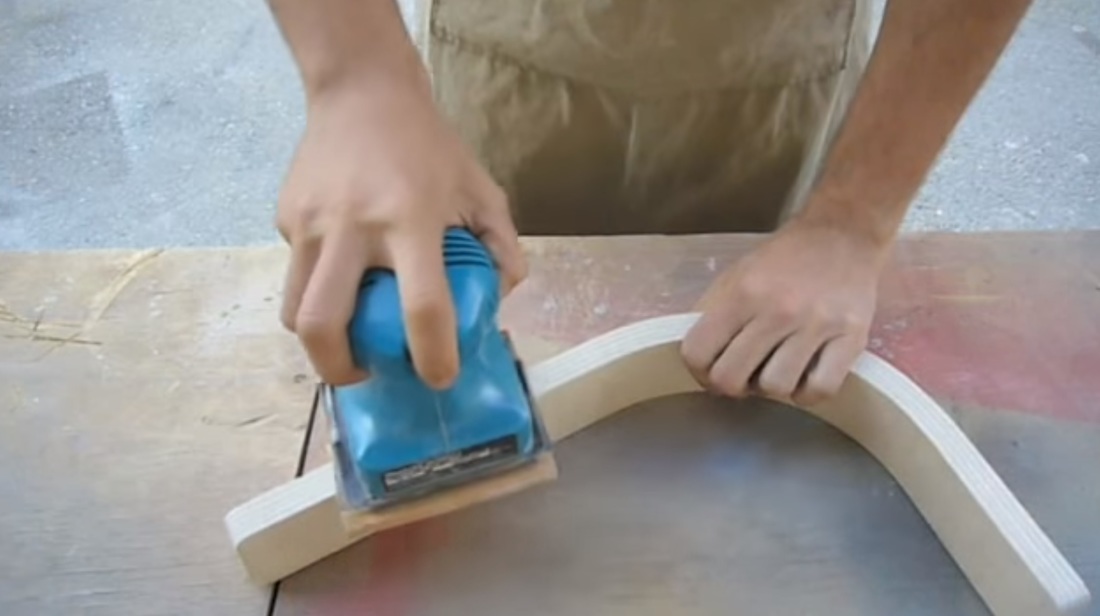
6. Now the chair leg can be trimmed and finished, using a band saw with a guide set up trim the excess material off of each side and a disc sander to square up the ends, the curved veneer form can then be finished to the desired effect.
Rob Thompson, Manufacturing Processes For Design Professionals (Thames & Hudson 2007).
'Molded Plywood' (Wikipedia, 2016) <https://en.wikipedia.org/wiki/Molded_plywood#Production_of_veneers> accessed 15 May 2016.
'Bent Plywood In 7 Easy Steps.' (YouTube, 2016) <https://www.youtube.com/watch?v=TXAeLwJ8fcw> accessed 15 May 2016.
'Bending And Forming Wood By Vacuum' (YouTube, 2016) <https://www.youtube.com/watch?v=6shKGR8tSVU> accessed 15 May 2016.
Kale Phillipson